 Assembly and Design of the Seat
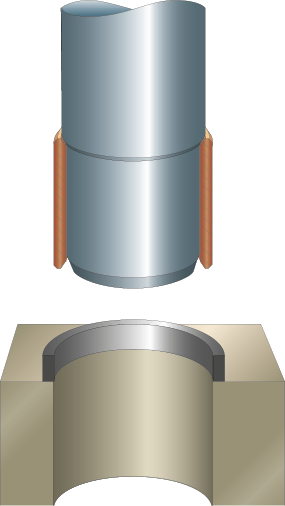
In most cases, our rolled slide bearings are assembled bypress fitting, following the same principle as for other closedbearings.
Use a press, or a punch with shoulder, during the assemblyof the bearing. For bearings, whose diameter exceeds80 mm, the help of a support ring is recommended.
For some applications, where BWG or turned bearings areused, these can be assembled by crimping. This methodreduces the risks of damaging the bearing and seat whenthey are being pressed in.
Frozen carbon dioxide (dry ice, CO2) is packed around thebearing, and it is allowed to cool down for about 2 hours.The bearing shall then be assembled immediately. It shouldthen be easy to press the bearing in to its seat with out toomuch force.
Assembly should be performed with an assembly punchand washer as in the diagram. The seats are formed witha 15 ˚ entry phase to straight bearings, and 45 ˚ to flangedbearings. WB802 bearings are significantly less sensitive todamage on the bearing surface than multi-layer bearings.
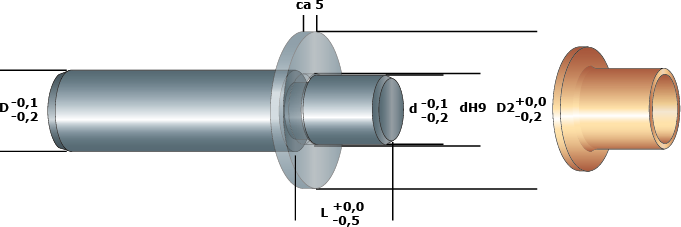
A washer corresponding to the flange diameter is used when assembling flanged bearings.Most bearings are manufactured to be pressed in to a seat that holds a tolerance of H7.

Shaft Design
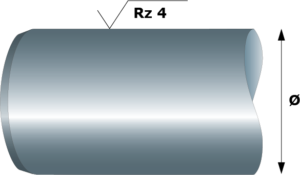 To make the assembly of the shaft easier, it shouldonly have one bevel. All sharp edges should be brokenso as not to damage the bearing’s sliding surface.
Having a smoother surface than recommended onlyincreases the lifetime marginally, while a rougher surfacewill significantly reduce the lifetime. As shown inthe figure on the right, we recommend a maximum Rzvalue of 4 μm.
The surface hardness of the shaft, where possible, should exceed 50 HRC. Alloy steels or steelswith an appropriate surface treatment are therefore recommended.Chrome plated shafts have also been shown for work well, as long as the chrome layer is as thinas possible.
Check Dimensions
Check the Inner Diameter
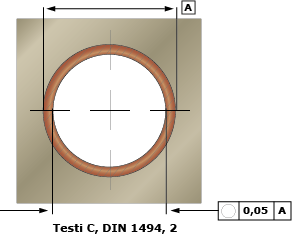
The inner diameter of thin-walled rolled slide bearings aretested according to DIN1494, part 2 test C.
To perform the test the bearing must be fixed in a referenceseat (table 5 according to DIN1494 part 1.
In this condition, the inner diameter is checked with a GOor NO GO cylindrical thread gauge. This method is normallysuitable for smaller bearings. For larger diameters,the use of a three-point micrometer is recommended.
Check of Axial Bearing
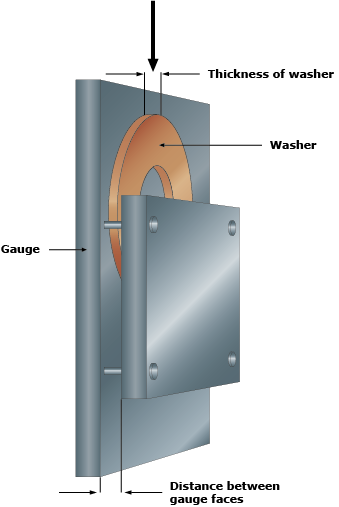
Apart from the thickness, the flatness is importantfor an axial bearing. These factorsaffect the lifetime for both the washer and theopposing surface’s material.
A method is used where the washer is droppedthrough the gap between two parallelfixed pieces whose surface must cover theentire surface of the washer.
To be approved, the washer must fall throughof its own weight.


